Tuesday 15 May 2018

TRANSITION: Project Evaluation


For this unit, Katie, Alex and I came together as a group. Once we decided what we wanted to do, we chose our roles. Because we chose to do a mockumentary, Alex wanted to write and direct as he had good ideas for it. Katie wanted to be the director of photography, I wanted to be the editor. I was excited to be the editor of the project as I've always enjoyed editing. However, I haven't edited in a few months because of the studio production, this gave me the reason to research and re-cap certain parts of editing that I wasn't strong on, like the audio and colour grading.


Pre-production
Alex thought of the idea for this unit. He first thought of a mockumentary in the style of Cunk On Britain. This was the first time I had heard of this programme as it's new with only five episodes in the first series. Cunk On is a spin off series from Charlie Brooker's Weekly Wipe. After I had watched the first episode I realised how much I liked it and I would watch it for fun, not just for research.

However, we came across a few problems with Cunk On as we couldn't think of a current subject matter that we could make funny. Therefore, Alex's second idea was still on the mockumentary lines but to create one based off a real documentary such as The Supervet and 24 Hours in A&E. He decided on The Supervet which Katie and I were very happy with. 
As I hadn't seen this documentary before, I decided researching into it and the editing techniques was essential. I looked into the effects, lower thirds and titles, with the aim of applying the same style to our mockumentary.  

I also researched into comedy editing because it was essential for the mockumentary to be funny, and half of the humour will come from how it's edited. I looked into other mockumentaries for this, such as Cunk On Britain, The Office and Come Fly With Me. I learnt about holding reaction shots here which is a very important comedy technique. I also looked into Laurel and Hardy's comedy techniques, which ended up helping me during a hard part of the edit.  

Alex next created the script which sounded really interesting and funny. Once we had the green light from Simon, we started planning the filming days and sorting props. 

Props and the set design were very important for our film. We need to make the audience think we are in a vets, for example we couldn't just film it in a house. Ideally, we needed a big room with plain walls that we could decorate to look like a vets. At the beginning, we had agreed to film at an events venue not far from London, but we came across a problem when they told us we couldn't bring a dog into the building. Therefore, after a bit of a rush Katie found another location, a Village Hall, who did let us have a dog in the building. 

Casting was important for our mockumentary as we needed someone who knew how to deliver comedy, Alex created character profiles and we casted two people according to these, Aidan and Samantha, we also used Coco, the chocolate Labrador. 

We took on a test shoot because we had a few camera movements, props and lighting requirements that we weren't sure would work or not. The test shoot day was a great time to try these out before the filming day, incase something didn't work and we had to change it. This day was particularly helpful for the surgery scene because we needed a suitable way to squirt blood. We started with a Lucozade bottle and progressed to a water gun, which is what we used on the filming day - this worked a lot better. The test shoot also gave me an opportunity to have a go at editing it the same as what we want for the final product. This then made the final edit slightly easier in places as I simply replicated what I did for the test shoot but with the new footage. 

My part of the producer role was to create the risk assessments, these were essential for the filming ideas we had, such as filming outside around the public and being dependent on the weather, the blood splattering scene, and using a dog in our film. As working with animals is not the easiest, a risk assessment outlining the risks and control methods was needed. 


Production
As the editor of the project I didn't have a lot to do during the filming days. I was there purely to help decorate the different rooms and to be a helping hand. I also had to leave slightly earlier to get back due to work commitments, so maybe it was ideal that I was the editor and not the DoP because I couldn't be there for all of the filming time, whereas I could fit the editing around work.

I think the filming days went well, while I was there we got a lot of footage and all the shots we needed, and I heard back from Alex and Katie after they finished and they were happy with the footage they gained. They said they were slightly rushed at the end of the first day as they thought they didn't have much time left in the room at the Village Hall, therefore the last scene, the surgery scene, was slightly rushed and they weren't happy with some of the footage they got. 

Obviously, filming in a vets means we would need to have an animal involved. We used Alex's dog, Coco. This seemed like a brilliant idea at the beginning but we did come across a few issues - they say never to work with animals or children. Coco cooperated very well, but there were times when we were trying to get her to sit when she wouldn't which wasted filming time. 

Luckily, the weather was good on both filming days. This was ideal because we wanted as much natural lighting as possible and we were outside when we were filming the cover shots of Sheila and Coco. If the weather was bad we would have had to postpone filming which we really wouldn't have had time for.


Post-production
As the editor, the post production was all on me. I liaised with Alex for advice on how he wanted the edit to look, while following the script and shot list. I mainly followed these, put something together and then showed Alex for his feedback. This was good system because there were points when I became stuck with ideas and I felt that the edit just wasn't looking very good. It was good to be able to ask Alex for any fresh ideas that he might have. 

Coming back the next day to carry on editing with a fresh mind worked well. Each day I edited, I improved on the surgery scene which was my biggest concern and struggle. I eventually made it longer and amusing, by cutting back to Sheila in the waiting room a couple of times, while hearing crashing and banging sound effects. This allows the viewer to imagine what is happening throughout the operation, accompanied by the sound effects. 

Towards the end of the edit I realised how important music is. The music beds I used gave a more upbeat tone to the mockumentary rather than it feeling like a drama. The timing of the music beds were essential to aid the comedy. I made sure they cut at awkward times which was amusing to watch, e.g. I stopped the sad music when the vet threw the dog in the bin, it then makes the viewer feel awkward that the owner has just seen her pet get thrown in a wheelie bin, but amused at the thought of it all as well.

Colour correction went really well, and gave me more confidence in the film. It was helpful that Katie knew how she wanted it coloured, i.e. warm and natural for Sheila's interview, shots of Coco and the waiting room. Slightly clinical looking for the consultation, and a strong clinical look during the surgery scene. This information made that part of the edit very simple and straightforward. 


What went well
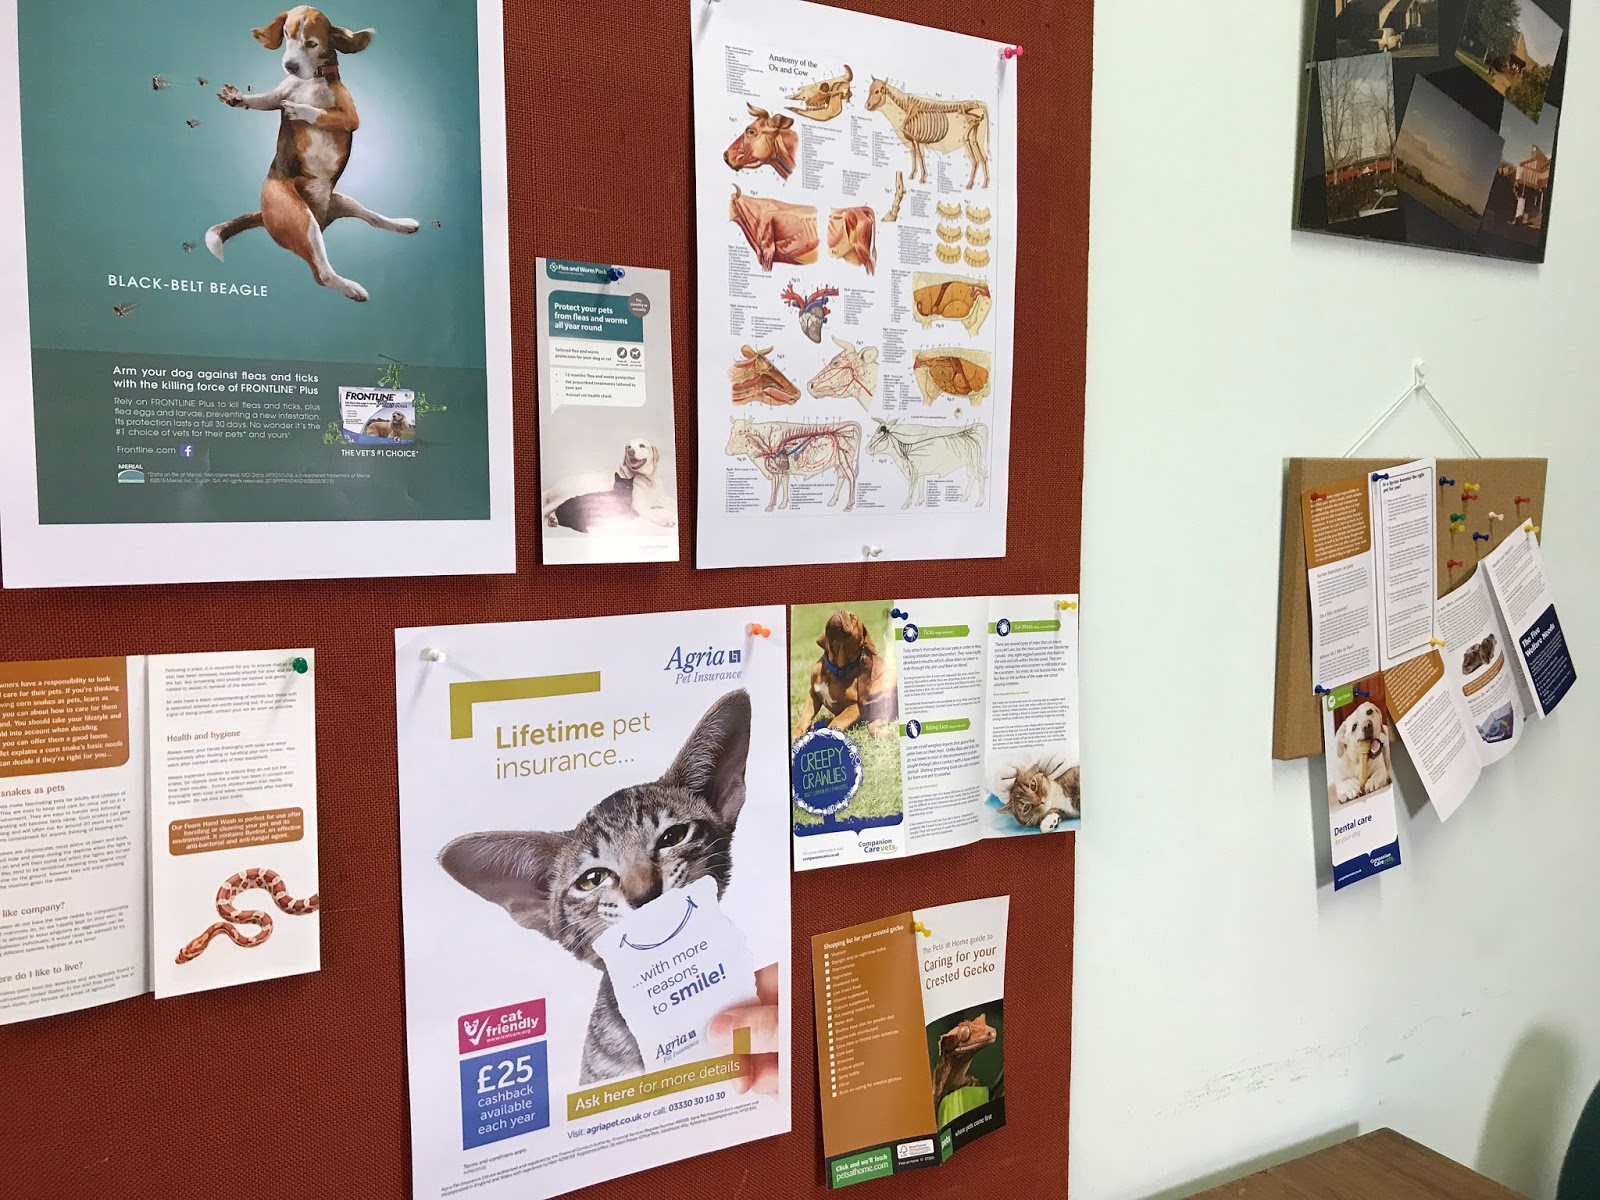
- The set design went really well. We were able to film in a room with plain walls, allowing us to dress it as a vets. I think we made a believable vet setting and the posters, leaflets and vet props added to the aesthetics well. 

- I think the location we got a few days before we were due to film was really good. I really didn't want to film in the lecture rooms because it would be difficult to change it into anything other than the lecture rooms, so we were very pleased with the location. 

- Researching into other mockumentaries and comedy techniques really helped. I wouldn't have got the surgery scene where it is now without reading about Laurel and Hardy. I had also never thought about holding reaction shots until I research into it. The edit wouldn't have been funny at all if I hadn't done the research. 

- Testing some of the tricky shots was very helpful for filming but more importantly for me, I was able to test my edit before the real edit. Luckily it went well and I didn't have to change my style for Sheila's interview, meaning this was a straightforward part of the final edit, and I could spend more time on harder parts like the surgery scene.

- The colour grading worked really well. The colours were awful before and didn't match at all, Katie and I worked well together and managed to match up all the shots, particularly wide shots and the matching close ups.


What didn't go well
- We didn't get professional actors from a casting website, which is ok but during the edit we realised at times they didn't give us the energy we wanted. E.g. the line "I'd milk that" that the vet says while the owner walks in the room was quite dull when we really wanted it to be said with a bit more emphasis. This wasn't the vets fault as he isn't an actor but we've realised how important it is to cast professional actors because they would be able to play the part better. 

- I wasn't 100% pleased with the audio in the final edit. I tried to get rid of the background hiss, I improved it but didn't take it away completely. This could be because we used a rode mic on top of the camera, meaning theres some noise from the camera in the audio and I can't do anything about this. Nevertheless, there was an improvement with the audio after I edited it which is the main thing.


What could be improved
- Next year, we will be using a casting website and holding auditions to cast our actors. 

- My time management skills could be improved because I was editing right up until the day before the deadline, and we were getting to a point where we were agreeing with bits rather than trying them another way to speed up the edit slightly. 

- My knowledge of editing from the start. I haven't edited in months because of the studio production, and I was very rough to start with. I should have researched more before this unit or edited regularly before to keep it fresh in my mind. 


What did I learn?
- I have learnt a lot about editing during this small amount of time. I was very grateful for my research throughout the project as I learnt things I didn't know before, and it gave me new ideas for the edit, such as Laurel and Hardy and the surgery scene, getting other people to watch the edit to see if its genuinely funny or not, and learning about holding reaction shots to maintain comedy.

- Working with animals can be hard but as long as we have a plan / shot list / script to follow to get through the day quicker, it's not too bad. We were lucky that Coco was well behaved, we also made sure she went out for walks regularly and had plenty of water to keep her happy. 

- I learnt how important music is, it changed the style of the edit completely which I was very happy with. 

- Colour grading can also change the look of an edit completely. I was feeling more confident with the film once we had colour corrected it. 

Monday 14 May 2018

TRANSITION: Editor's Statement

Once I was confirmed as editor for VET-MAN I started researching into my responsibilities, the workflow of an editor and different comedic editors. In order to be successful as an editor, I needed to learn and work in the same way an industry professional would. 

Research was essential for this unit because we chose to create a mockumentary - a comedic documentary. I have never worked on a comedy before, and my initial knowledge of this was very weak. I started by researching other mockumentaries and their editing techniques. Through this research, I found out about different ways to edit comedy, including holding reaction shots, letting the sound effects and music do the talking while not actually seeing the comedy, and I found out how important timing is. If a shot isn't cut in the correct place it can change the style of it completely, this can relate to cutting music also. 

I looked into an iconic duo - Laurel and Hardy. One of their comedic techniques was to let the sound effects carry the humour while the audience are watching something else, for example, hearing someone falling down the stairs while looking at some else's reaction. They inspired my editing choice when I became stuck on one of the most important scenes in the mockumentary - the surgery scene. Due to running out of time during production, I was working with less footage than anticipated and didn't have enough to make the scene dramatic and funny. I started by building up the tension of the operation by watching the vet preparing with putting his gloves and face mask on. While this is happening we are listening to the vet's interview, confidently stating that "this is a very simple procedure, it'll be over in a flash". Then we see him googling how to operate on a cow, this aims to make the at-ease audience nervous, before seeing him inject the dog once. As we see this, I cut to Sheila in the waiting room while hearing a muffled crashing and banging coming from the operation room. By using this technique I am allowing the audience to imagine what's going on while only hearing the crashing sound effects. 

As well as putting the footage and dialogue in line, I also had to think about music. Specifically the timing of the music as this can help the comedic aspect to the film. My example of this is when I placed a sad music bed underneath the clips of the vet telling Sheila about the operation, once he announces the news we then see him taking something covered in a blood-stained sheet to the wheelie bins round the back of the vets, and he throws it in the bin. This creates a loud thud, as this happens we see Sheila walking past behind witnessing the vets actions, and stopping in shock. As the object hits the bottom of the bin I stopped the music, this then made the clip silent while the vet turns round and notices Sheila, and awkwardly waves at her. Although it's a heartbreaking scene, it fits with the music until the music stops, and it then becomes comedic. 

I looked into a few mockumentaries, such as Cunk On Britain, Come Fly With Me and The Office and they all contain the same common editing technique of holding reaction shots. This inspired me to use this method to help maintain the comedy through the less exciting, more conversational scenes. 

This technique worked really well during the consultation scene as we see the vet examining Coco where he puts the stethoscope on the dogs back, after this odd move from the vet I cut to Sheila to see the confusion in her face, he then proceeds to sniff the dog, which again I cut back to Sheila to see even more confusion on her face. The method also worked later on in the consultation because we watch the vet drawing something on a notepad, all we hear is the marker noise on the paper, while he's drawing I cut from him to Sheila about four times. The fact he is drawing for this long, allowing me to cut back to Sheila this many times is amusing, her facial expressions of even more confusion add to the comedy as well.

As the editor of this project, my aim was to bring the comedic elements in the mockumentary to screen, otherwise VET-MAN could come across as a serious documentary about a vet who is very bad at his job. I think I have brought humour to the final piece, as I have had a few people watch it and genuinely laugh. I think this can confirm that I have achieved my aim.

TRANSITION: Fine Cut Feedback

Katie, Alex and I had a meeting with Simon to show him our fine cut. 

Simon's feedback
- Our mockumentary doesn’t feel like documentary in terms of how it's shot. It's mainly filled with low camera angles and cutting from wide to close ups like you would with a drama.


- Good title sequence and opening and the interviews are shot well.


- We could do something in terms of music to give it an upbeat feel rather than a drama feel. He liked the music at the beginning so maybe bring that in more. 


- The edit is working well, not much more that can be done with that in terms of placing the footage. Audio and colour is still to be worked on.


- When the doctor is talking to Sheila the first time (when he examines Coco), maybe have something else, in terms of other shots because it's very much just looking at them talking.

- The doctor gets cut off when he shows the cow drawing

- Main concern is that it should have been shot as a fixed camera documentary like we pitched.


Response to feedback
I was very happy with Simon's feedback from the editing point of view. I'm glad he thinks all the footage is in the correct places and all that's left is audio and colour correcting.

I understood what he meant in terms of the film not shot like a documentary, however, Katie, as Directory of Photography, had researched into mockumentaries and there was a method to what she decided during the filming days. I think she wanted it shot more like Come Fly With Me where they involve lower camera angles, as opposed to The Supervet which is shot like a traditional documentary. Maybe we should have thought about this and were clearer with each other about how we were going to have it shot, because then one of us might have flagged this issue. 

I am very keen on working with more music because I completely forgot about adding music during the film, I only had in mind the beginning and end to include music. I think the main parts that need music are the interview with Sheila (like in the rough cut), the surgery scene, when the doctor breaks the bad news to Sheila, and the ending which will then evolve into the credits.

TRANSITION: Editing the Mockumentary

As editor of this project, I have full responsibility of how the mockumentary is put together. I will liaise with Alex to make sure I am delivering his vision appropriately. 

I previously did some research into the workflow of an editor and I'm glad I did as this made the set up on Premiere much easier by following the workflow stages. I started by importing the footage into Premiere and I made separate bins to split up the shots - this made finding specific shots a lot easier.

Screenshot of bins for VETMAN

I forgot to sync the audio on the rough cut as I haven't edited in a while, but I made sure I remembered to do it this time. I only had to do it on the scenes containing dialogue, we had a multi-camera set up so we needed both sets of audio to play together. To do this I simply layered shot one on top of another and lined up the audio as close as I could and listened to see if they were in sync.

As Katie had shot this particular interview with Sheila three times, once I had synced the three different sets of audio, I decided which one was better and which I was going to use - I am also able to mix and match and use the other two if some parts of the dialogue sound better. 

Syncing audio for Sheila's interview

Syncing audio for Sheila's interview

The next thing for me to do was to start putting the footage together as it is, without worrying about audio levels and colour grading. This will create the rough cut. I did this by following the script and shot list, as this is how Alex and Katie would have planned the mockumentary in their heads and my aim is to replicate this on screen. 

I made sure to put enough reaction shots in of Sheila to maintain the comedy aspect to the film. 


Titles & lower thirds

I spoke to Alex about the having the title and lower thirds replicate The Supervet's, he said he liked that idea but we'll change it slightly. For the title I put Dr. Tim Stewart and underneath in bigger and bolder writing VET-MAN. I added a 3D effect to VET-MAN to give it a bit more bulk, but kept it in a plain font and in white to replicate The Supervet's style.


The lower thirds were done in the same font and style, similarly to The Supervet. However, instead of keeping the captions plain for the owner, Alex suggested for Sheila's lower third having 'Human Being' underneath her name to add to the humour of the show. Sheila's interview is an emotional part of the film so it made sense to put a bit of humour in it with the caption. 


Rough cuts

Rough cut 1

The first rough cut consisted of me putting down all the shots in the correct places on the timeline. This included the opening sequence of Sheila walking into the waiting room, Sheila's interview (including cover shots of Coco), the consultation, surgery scene and ending.


Screenshot of VETMAN timeline

Putting together Sheila's interview was relatively easy as I replicated the test shoot, but with the new footage. Again, I made sure to keep the emotional parts on Sheila's close up, and cover with the dog footage when we speak about her. 

The surgery scene was very difficult as I really wasn't sure how to approach it. My initial thoughts were that it would need to be fast paced with quick shots, and I haven't done this particular editing before. In the end I just put shots down in an appropriate order to have something in that gap. I will look closely into this during the second rough cut, when all the other shots are in place. 


Feedback:
I asked Alex to have a watch and give his feedback.

- Opening sequence needs to be quicker. There's too much of a gap between dialogue. This will also introduce the comedic elements in the mockumentary. 

- Surgery scene needs improving 

- Condense the off-camera dialogue, again to speed up the pace 

- Colour grading - try to match the interview scenes picture

- More shots to establish the vets surgery

- Have the photo of Kevin on the part where Sheila says he didn't make it


Rough cut 2

During the second rough cut, I sorted some of the audio. All the audio had a slight hissing noise on it from the microphone as we had it strapped to the top of the camera, so I had to remove this to improve the quality of the sound. I did this by editing the clip in Adobe Audition, capturing the noise print of a quiet part of the clip, and applying this to the whole clip.


Editing audio in Adobe Audition

Corrected audio is now green

I also made the title sequence shorter, following Alex's feedback. Before it was a whole continuous sequence, I took a few shots out and shortened the others and it still flows well. The dialogue is also a lot closer together and flows well throughout the beginning of the film.

I have improved the surgery scene by following Laurel and Hardy's technique. Instead of showing the whole scene in the surgery room, I have cut back to Sheila waiting for the operation to finish while we hear a few crashes and the Doctor swearing. I have then cut back to the doctor with the blood splashing in his face. He then appears at the waiting room door covered in blood ready to tell Sheila the bad news with a blood-stained leaflet. This worked better but still needs improving, I am unsure on how to do this yet, but I will keep experimenting with it.

I created a title sequence and the title of the mockumentary. Alex said he liked the idea of having a few clips of animals and then having a shot of the doctor at the end posing. I did this with royalty free stock footage but Katie is going to take a few videos of her own animals to use, as we want our mockumentary to showcase just our work. After picking the music for the title sequence (which Alex liked), I transitioned the animal clips to fit with the beat of the music, so they slide offscreen and the other one slides on. This worked really well and we all liked the outcome.


Feedback:
- Alex said the music for the title sequence should go on for longer, underneath the voiceover until we see Sheila and her sad music will start. 

- The surgery scene is a lot better but maybe muffle the sounds as if we are looking at Sheila, she would be hearing this through a wall and therefore so will the audience. Muffling the sound will work for this. The surgery scene needs to be longer also as its over very quickly.


Rough cut 3

I have added another reaction shot to the consultation scene, this also covers a camera shake, and it makes the conversation more awkward and therefore funnier. 


Alex helped me to muffle the sound in the surgery scene as audio isn't my strong point. I edited the clip in Adobe Audition, on FFT filter - effects - filter and EQ and after going through the different sound presets, we agreed on 'The Club Downstairs'. This worked well for the banging noises but no so well with the swearing as you couldn't really hear what he was saying at all. Therefore, I researched into other ways to muffle sound and found that there was an effect on Premiere which essentially was easier and less hassle than importing the clip onto Audition. The effect was called 'Lowpass' and muffled the sound while we could still hear the words clearly.  


Audio during the surgery scene

To complete the ending, I added the bin thud when the doctor throws the dog into the big wheelie bin. I found this effect on Freesound and I think it works really well. We wanted to emphasise the thud into the bin so this part sounds a lot better now. 

I have finally cracked the surgery scene, and we all really like it. It developed when I changed shot to looking at Sheila instead of see inside the surgery room but it was still too short. After a few days of thinking about it, I have found an appropriate way to extend the surgery scene and it is so simple - I cut back to Sheila once more. I'm not sure why I didn't think of this before, I think I needed those few days over the weekend to think about it with a fresh mind. I did come up with another idea where we could cut back to a shot of Sheila in the park with Coco and blur and brighten the edges as if she was dreaming / thinking of playing with her beloved dog, and then the doctor comes out to shatter her dreams. However, the idea of simply cutting back to Sheila again is a lot easier and helps the scene flow well instead of bringing in another shot, I cut to her hands this time in her lap while prolonging the banging and crashing noise to cover this. 


Screenshot of added surgery scene

The music was next to be placed on the timeline. After Simon's feedback about the use of more music I started looking on YouTube and Freesound for more which would appropriately fit the surgery scene and the bit when the doctor breaks the news to Sheila. Alex said a dramatic music piece would fit well with the surgery scene and it was clear that there needed to be a sad / emotional piece for Sheila's heartbreak. I found two pieces, one called 'death match' from YouTube and the other called 'grave matters' from Kevin Macleod (who will be credited at the end of the mockumentary). 'Death match' was very dramatic and was very appropriate for the surgery and 'grave matters' was emotional enough for Sheila. 

I placed the surgery music as the doctor was putting his rubber gloves on and preparing for the operation, which worked really well. I then ended it as soon as he injected the dog. This felt right because this is when the serious side stops and the funny side starts.

I placed Sheila's music as the doctor stepped into the waiting room to break the news. I ended this music piece at the point when he throws Coco in the wheelie bin. This seemed appropriate because the footage all flows well until he turns round and sees Sheila watching him in disgust - this seemed the right part to end the music, he then gives a small wave at Sheila as if it's an 'oops' moment, the silence makes this shot very awkward but amusing. I am very happy with the music running throughout the mockumentary, it uplifts the film and takes it away from the style of a drama. Lastly, I added the same music from the start at the end. I start this just as hear the vet say "it's just part of the job". The quick cut and transition into the fun music adds to the comedy aspect.


Feedback from Alex:
- The audio needs to match in volume throughout the mockumentary. The audio should be around -6 dB.

- There are a couple of shots with audio still not edited

- Make sad music at the end start slightly earlier

- Turn up the volume on the consultation scene

- Add in another reaction shot during the drawing of the cow & sniff

- Cut to "these hands" as a close up a bit later

- Stay on the blood stained leaflet shot for longer

- Colour grading needs to be complete but apart from that, it's pretty much done


Colour grading

Katie is DoP and it is her job to decide how the shots look. I liaised with her to how she wanted the shots coloured. This is the last thing I did to the edit. 

We didn't have to spend a lot of time on the colour correction because being shot like a documentary, it's meant to be real therefore, with everyday colours. In a drama there would be heavy colour grading to suit the tone of the film. We simply just had to make the colours match throughout and spend the most time during the operation scene it a clinical look.

Colour from rough cut 3

Colour corrected

The colour correction was essential as seen in the photos above. The colour changed a lot between the two different cameras. Katie wanted to keep the warm tone that she filmed so we just brightened the wide shot and brightened and changed the close up to match. I did this on an adjustment layer so I was able to apply the exact same colour changes on the same shots, e.g. in Sheila's interview where we keep cutting back to her close up, all the close ups would have needed to look the same. 


Rough cut 3 (top) Final cut (bottom)

The consultation scene needed a fair amount done to it because the original colour wasn't very nice and we wanted a slight clinical but natural look to it. This meant brightening it and adding in blues and purples until we got the desired look (above: bottom photo). Again, I applied this to an adjustment layer so we were able to keep the same colour choices throughout the whole scene. We just made sure the colour of the doctors shirt and Sheila's dress matched in each shot to guarantee a even correction throughout the scene.


Rough cut 3 (left) Final cut (right)

Mine and Katies hardest job in the colour correction process was the surgery scene, as we wanted this to have a very clinical look to it. This consisted of putting in a lot of blues and purples and brightening the shots a lot. We are very happy with the final look we came to, again the adjustment layer takes the colour changes over each shot to maintain the continuity throughout the scene. 


Chosen colour corrections for surgery

Final cut


Final VET-MAN timeline

I had matched up the audio so the volume flows well throughout the mockumentary. I have taken the hiss out of every audio clip however, there is still a slight noise, it is an improvement from the beginning but it's not perfect. I really struggled to get rid of the hiss, we think it's because we used the rode mic on top of the camera and not a boom, meaning we can hear some camera noise, which is something I cannot get rid of in post production. It's frustrating but it's only prominent when wearing headphones so it's only a small issue.

Katie and I have finally colour corrected it so it looks a lot more professional. 


What have I learnt throughout the edit:
Each rough cut is developed well and I am happy with how the film finished.

- I have learnt new things about editing while doing this, whether they be from research or Alex's help and advice. 

- I have learnt how important music is. The underlying sound tracks throughout the film changed the style of the mockumentary which I never expected them to do. Luckily we were able to fall back on the music to help get our mockumentary away from the style of a drama, as it was too late to re-shoot any footage, giving the fly-on-the-wall effect. The timing of the music is also essential to help bring out the comedic aspect of the mockumentary. 

Sunday 13 May 2018

TRANSITION: Website

We pitched our proposed delivery plan as a website. This will showcase our initial aim, final product and the choices behind our decisions with our specific statements - mine is the Editor's statement.


Our website linkahargood.wixsite.com/vet-man

Saturday 5 May 2018

TRANSITION: Filming the Mockumentary

We shot the mockumentary over two days (5th-6th May). We had a full cast and crew, but I had to leave half way through on the first filming day due to work commitments. As I am the editor of this project, similarly to the test shoots, I didn't have much to do during filming. I helped decorate the setting and was mainly just a helping hand. 

I started by putting chairs out in the waiting room as this is essential for any waiting room. To decorate it more I pinned up a few posters of animals that Katie found up on the walls, just to add to the aesthetics of the vets. 

Waiting room posters

We placed the doctors table against a wall with notice boards so we were able to pin up more posters and leaflets. As this corner will be our consultation room we needed to decorate it to make people believe we were in a vets. Additionally, we added the laptop, a note pad and pen and a couple of toy cows to add to the humour. 

Doctors consultation desk

Consultation desk posters / leaflets
The cameras and lights were set up, we closed the blinds slightly and added the soft boxes to give a natural but clinical look, and this lighting gave an even light across the whole shot.

We had all cast members and Coco from the beginning of the day so as soon as we had finished decorating, we were able to start filming. 

The consultation between Dr. Stewart and Sheila was the first bit we filmed as we knew it would be the trickiest. There was a lot of dialogue in this scene, and we needed to work with Coco as this scene includes her examination. We knew it would be difficult to work with a dog so this is why this scene was first to be shot. We needed a shot of the doctor looking at cows on his laptop when Sheila walks in, for this Katie set up the two DSLR's behind Aidan with one at a wide shot to capture Sheila walking in and the other on a close up on the laptop so the audience can see what he's looking at.

The cameras for the rest of this scene were set with one facing the doctor and another facing Sheila. This way we were able to get the conversation on both cameras on both people. In the edit, I will be able to sync the audio recorded here and then the dialogue will flow well with whoever we are looking at, at the time. Katie made sure the white balance was correct and she had a clear picture to make the edit easier. It'll be easier to colour correct footage which has a decent colour to it at the start. 

I was watching to ensure they had enough coverage for me to edit with. 


After I left, they filmed the waiting room scene, and the opening of the mockumentary where Sheila walks into the vets. From their feedback, I found these scenes went really well and they got a lot of good footage and coverage for me to work with. 

The surgery scene was next and we all knew this would be a difficult one. They used the opposite corner from the consultation scene to be the surgery room, they didn't want to use the same corner so it looked as if we were in different rooms. Using this corner also meant we were away from the door and had clear walls behind us. They covered the floor with newspapers and covered the table with a plain sheet to prevent any mess staining the furniture. Similarly to the test shoot, they used the two smaller LED lamps, one above Aidan on a strong setting, with another underneath on a lower setting. This scene will need to be colour corrected to give a more prominent clinical look but the lighting set up will help the shots look good before I even edit it. They missed a few blood splatters because the camera was on the tripod when it should have been handheld, and they were rushed because they thought they were running out of time in the room, however, they got enough coverage of Aidan, the blood, and cutaways of the equipment for me to work with.

They also filmed the post-surgery interview with Aidan as he still had the non-toxic fake blood on his face and scrubs, they used the soft boxes for this giving a clear shot. Again, this will be corrected in the edit anyway but it was helpful to have a decent shot in the first place. Throughout the surgery scene, they made sure they didn't spill any of the blood on any surfaces, and they were prepared with towels, cleaning products, and had a sheet over the table to prevent this from happening. 

As we didn't get it all filmed on the 5th, Alex and Katie finished the filming & recorded the voiceover the following day. They need to film the covering shots of Sheila and Coco, luckily it was another nice day outside giving a good look to the shots. They wouldn't have been able to use artificial lighting in a field so we were lucky to film on a nice day. Katie got many shots of them both playing in the park, giving me a lot of coverage to work with.

The interview with Sheila also went well. Katie set up both cameras, one at a wide and one at a close up so I had coverage to cut between. Using two different cameras had it's disadvantages as the shots looked very different, but this was a problem for me to fix during the edit. I will sit down with Katie (as Director of Photography) towards the end of the edit to colour correct the mockumentary. 

Friday 4 May 2018

TRANSITION: Risk Assessments

Katie, Alex and I took on different jobs within the producer role - Alex found the cast, Katie found the location and I made the risk assessments. Once Katie had found the location, she passed the information and photos onto me and I made the risk assessments. We usually need these to take equipment out at the studios, however for this project we wanted to use our own equipment, therefore we didn't need to borrow any equipment. I thought it would still be useful for us to have a risk assessment anyway. 

Risk assessments for three locations:


TRANSITION: Updated Location

Unfortunately, we were unable to use the events venue because we later found out that we aren't allowed to bring a dog into the building. This was very inconvenient because our mockumentary is based on an animal, but obviously it couldn't be helped. This meant that we needed to find another location fast as we were shooting the following weekend. We thought about going back to the lecture rooms but we were also unable to use these at the weekend. 

Katie got into contact with the people at her local village hall and they allowed us to film in one of their buildings with a dog, which was perfect. We had to pay for the room at £16 for the afternoon, which was cheaper than the previous location, but between three of us that isn't much at all. There is a kitchen in the Village Hall allowing us to give Coco regular drink breaks.

There were two rooms available for us to use, the foyer into the hall and the meeting room connected to it. The meeting room was one big room, filled with tables and chairs. We were allowed to change anything we wanted as long as we put it back after. We can push one of these tables up against the wall with the notice boards so we can pin our own posters up for the background of the shot in the consultation scene. We can also use one of the tables as a operation table into the opposite corner with plain walls to help keep all the focus on the doctor. 

Possible consultation room / surgery room

Possible consultation room / surgery room

There was a big window across one of the walls in the meeting room, letting in a good amount of natural light. There were also blinds and light switches so we will be able to make the room dark for the surgery scene. We will accompany the natural light with soft box lights to brighten darker parts of the shot. A brightly lit scene will make editing a lot easier as well as I will be able to do more with colour correction with a clearer shot. 

The foyer to the hall was a smaller room with brick walls. I really liked the style of this room and was eager to use it as a waiting room instead of using the meeting room for all three different rooms. The door at the back left hand side was the door to the meeting room, it was good that they were connected as we could get a shot of the doctor calling the owner in to use a good amount of space in the waiting room and show off the good location. This room also had three big windows which were able to let a lot of natural lighting in. This is essential for our mockumentary because we want it to look real and not staged with a lot of portable lighting. If we need to use artificial lighting we will be using soft boxes to help disperse the light to create an evenly lit set.

Possible waiting room
There was already a table at the back which could be used as a receptionist table. Even though we don't have a receptionist anymore, the table will still be useful for the corners of shots to let the viewer think that there is a receptionist there - giving off a better idea of a waiting room. Behind the table there is a notice board filled with the Village Hall's leaflets, Katie checked and we are allowed to remove this and replace them with our own as long as we put it all back when we're finished.


Outside the Village Hall there is a large field, ideal for our covering shots of Sheila and Coco. This is free for anyone to walk on, so we will have to film around the public. This may be a problem if it's a really sunny day, but the field is big enough for us to find a space with no one around. Weather is an issue on it's own, if it's raining we'll have to wait for the rain to stop or reschedule as we will not be able to go outside with the equipment.


For the homely location for Sheila's interview, we've chosen to use Katie's house. In her dining room there is a large patio door which can let in a lot of light, giving us the natural lighting suitable for a home shoot. This will also be much different to the lighting in the surgery scene which is what we aim for. Again, we aim to just use the natural light, however, if we need to use artificial lighting, we can use the soft boxes to disperse the light evenly over the shot. 

Now, I have all the final location details I can work on the risk assessments so we know in advance any risks we need to control on the filming day. 

Thursday 3 May 2018

TRANSITION: Research into Audio & Colour Grading

After editing the test shoot, I realised how much I had forgotten or didn't even know about editing over the last 4 months. I knew audio was never my strong point, but for this unit I want the audio to be perfect so I did some research into it, along with research on colour grading. If I learn it now, this will save time during the edit. I picked out specific points to learn depending on what I'll need to use during the edit. 

Audio effects
DeNoiser - gets rid of background noise without using Adobe Audition.

Equaliser - if the audio is base-y, or high frequency / high pitched audio. Go on effect settings and press 'Edit' and it shows a visual example of what the audio is looking like, e.g. in a graph. Can change the effect while watching the clip with the visual audio graph. Bring the base down and the audio can sound like someones talking on a phone.

Reverb - gives an echo to the audio - can change the different types of echo, e.g. small room, church etc. 

Audio should be at -3 and not peaking. 

Get all audio louder - right click - audio gain - normalise peaks to -3 

Compressor (dynamics effect) - gives fullness to the audio. Compress the peaks, and help the quieter audio become louder. Effect settings - 'Edit' - compressor column - 'Ratio' no more than 4.50. 'Makeup' at 12.

Mastering - 'Edit' - subtle clarity (however gives reverb). 

Treble - 7db 

Save these effects as a preset - select audio clip which has effects on - effect settings, group select all effects - right click 'Save preset' - type 'Scale' - rename - adds to effects column.

Reducing noise in audio clips - Effects > Noise Reduction/Restoration > Capture Noise Print.
In the Editor panel, select the range from which you want to remove noise.
Choose Effects > Noise Reduction/Restoration > Noise Reduction


Colour grading
Colour matching effect - Lumetri colour panel (effects control) - 'Colour wheels & match' tab - 'Comparison view' - disable face detection if no faces in shot - 'Apply match'.

Mask tool - draws free-form marks and shape masks. 'Basic colour correction' colour tools (inverse mask selection) - excludes the masked area from colour corrections applied to the rest of the clip. You can add multiple shape masks with different colour adjustments applied to different areas of a clip. 

Save colour presets - Lumetri colour pop-up menu - 'Save Preset' - rename - description - 'Apply'. 

Add a key - Eyedroppers to select / add / exclude target ranges - select eyedropper - move over the colour range you want - click to apply the range - hold down Cmd / Ctrl modifier key while hovering over the programme monitor - set eyedropper to 5x5 pixel selection - select colour range from the colour range presets (C/M/Y/R/G/B). 


References: 
https://www.rocketstock.com/blog/editing-audio-in-premiere-pro/

- https://helpx.adobe.com/uk/premiere-pro/using/color-workflows.html#main-pars_header_5

MAJOR PROJECT: Project Evaluation

Production My aim for this major project unit was to further develop the aspects of production which I had written about in the p...